Create a Pilea Paradise: How To Propagate for Maximum Impact sets the stage for this enthralling narrative, offering readers a glimpse into a story that is rich in detail and brimming with originality from the outset. Pilea plants, with their charmingly round leaves and vibrant green hues, have captured the hearts of plant enthusiasts worldwide.
Their popularity stems from their ease of care, adaptability, and the sheer joy they bring to any indoor space. This guide will delve into the captivating world of Pilea propagation, empowering you to create a thriving Pilea paradise in your own home.
From the basics of leaf and stem cuttings to the art of division, we’ll explore the most effective methods for multiplying your Pilea collection. We’ll also discuss the ideal growing conditions, including light, temperature, humidity, and soil requirements, ensuring your Pilea thrive.
Along the way, we’ll address common challenges, such as root rot, leaf drop, and pest infestations, providing practical solutions and preventive measures to keep your Pilea healthy and happy.
The Allure of Pilea
Pilea plants have taken the plant world by storm in recent years, becoming a favorite among seasoned plant enthusiasts and casual green thumbs alike. Their captivating charm lies in a unique blend of aesthetic appeal, ease of care, and a touch of trendy coolness that resonates with modern plant lovers.
Aesthetic Appeal
Pilea plants possess a captivating beauty that sets them apart. Their foliage, often characterized by vibrant green hues, delicate textures, and striking patterns, adds a touch of natural elegance to any space. The versatility of Pilea is another key factor in its popularity.
These plants thrive in various lighting conditions, making them adaptable to different home environments.
- Unique Features:Pilea plants boast a range of captivating features that contribute to their aesthetic appeal. For instance, the Pilea peperomioides, also known as the Chinese Money Plant, is renowned for its round, coin-shaped leaves, symbolizing prosperity and good fortune in many cultures.
- Versatility:Pilea plants are incredibly versatile, thriving in various lighting conditions, from bright indirect light to low light, making them suitable for a wide range of indoor spaces.
- Textural Variety:Pilea plants offer a diverse range of leaf textures, from the smooth and glossy leaves of the Pilea cadierei (Aluminum Plant) to the fuzzy, velvety leaves of the Pilea involucrata (Moon Valley). This textural variety adds visual interest and depth to any plant collection.
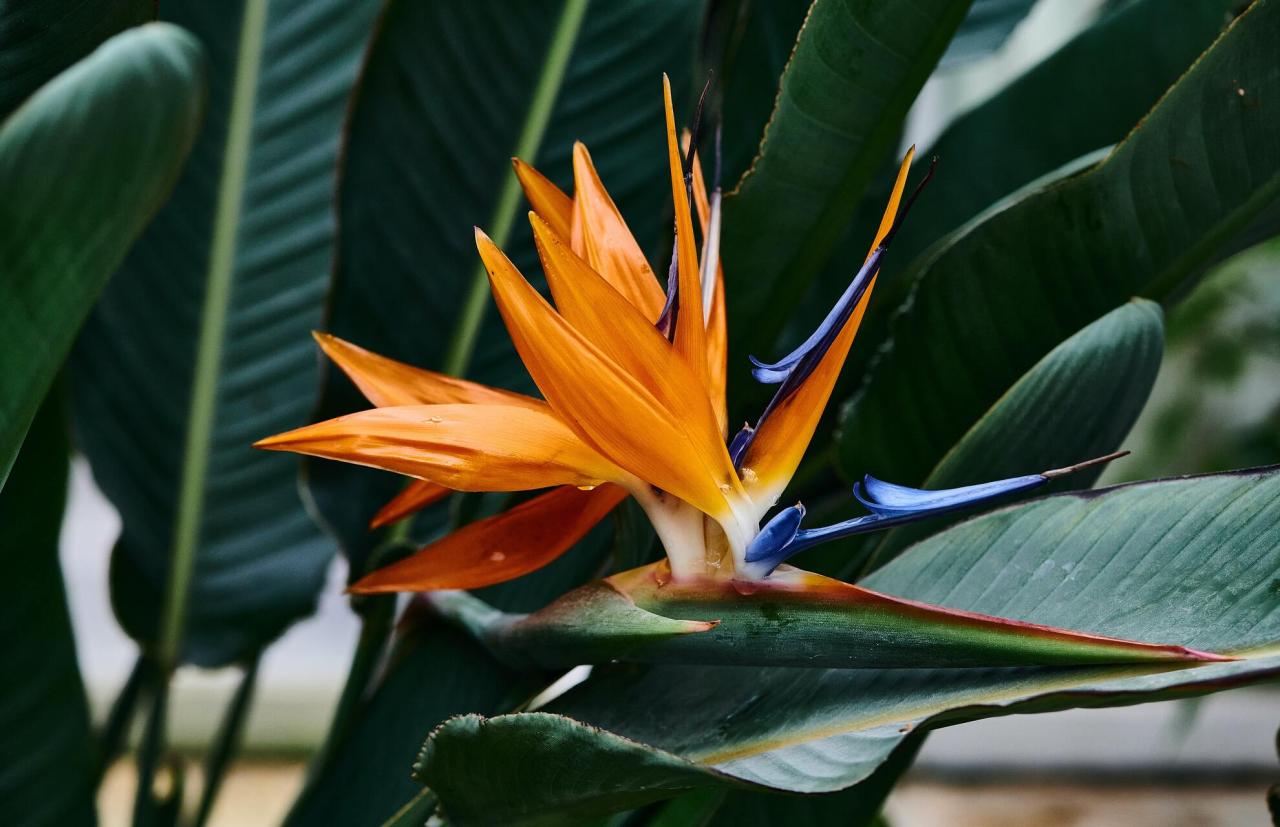
While Pilea propagation is known for its ease, achieving vibrant blooms can sometimes feel like a horticultural challenge. For those seeking the stunning spectacle of exotic flowers, mastering the art of propagation for plants like the Bird of Paradise is a must.
Check out The Best Practices on How To Propagate Birds of Paradise for Gorgeous Blooms for a comprehensive guide. These techniques can also inspire you to explore new approaches to your Pilea propagation, leading to a lush and flourishing paradise of your own.
Unlocking Pilea Propagation
Pilea propagation is a rewarding process that allows you to expand your collection of these delightful plants, share them with friends, or simply enjoy the satisfaction of creating new life. There are several effective methods for propagating Pilea, each with its own advantages and considerations.
Leaf Cuttings
Leaf cuttings are a popular method for propagating Pilea, particularly for varieties like Pilea peperomioides (Chinese Money Plant) and Pilea involucrata (Friendship Plant). This method involves taking a healthy leaf and inducing it to develop roots and a new plant.
- Select a healthy leaf:Choose a mature leaf that is free from damage or disease. Avoid using leaves that are too young or too old.
- Cut the leaf:Use a sharp knife or scissors to make a clean cut at the base of the leaf, ensuring that you include a small portion of the stem. This small stem section is crucial for root development.
- Prepare the soil:Fill a small pot or tray with a well-draining potting mix. You can also use a mixture of peat moss and perlite.
- Plant the leaf cutting:Gently insert the stem end of the leaf cutting into the soil, making sure that the leaf itself is above the soil line.
- Water thoroughly:Water the soil thoroughly to ensure that the leaf cutting is well-hydrated.
- Provide warmth and humidity:Place the pot in a warm, humid location. You can cover the pot with a plastic dome or bag to increase humidity.
- Monitor for roots:Within a few weeks, you should see signs of root development. New growth will appear at the base of the leaf. Once the roots are well-established, you can transplant the new plant into a larger pot.
Stem Cuttings
Stem cuttings are another effective method for propagating Pilea. This method involves taking a cutting from a healthy stem and encouraging it to develop roots.
- Select a healthy stem:Choose a stem that is at least 2-3 inches long and has at least two nodes (the points where leaves grow).
- Cut the stem:Use a sharp knife or scissors to make a clean cut just below a node.
- Remove lower leaves:Remove the leaves from the bottom inch or two of the stem. This will prevent the leaves from rotting in the soil.
- Prepare the soil:Fill a small pot or tray with a well-draining potting mix. You can also use a mixture of peat moss and perlite.
- Plant the stem cutting:Insert the stem cutting into the soil, ensuring that the node is buried below the soil line.
- Water thoroughly:Water the soil thoroughly to ensure that the stem cutting is well-hydrated.
- Provide warmth and humidity:Place the pot in a warm, humid location. You can cover the pot with a plastic dome or bag to increase humidity.
- Monitor for roots:Within a few weeks, you should see signs of root development. New growth will appear at the top of the stem cutting. Once the roots are well-established, you can transplant the new plant into a larger pot.
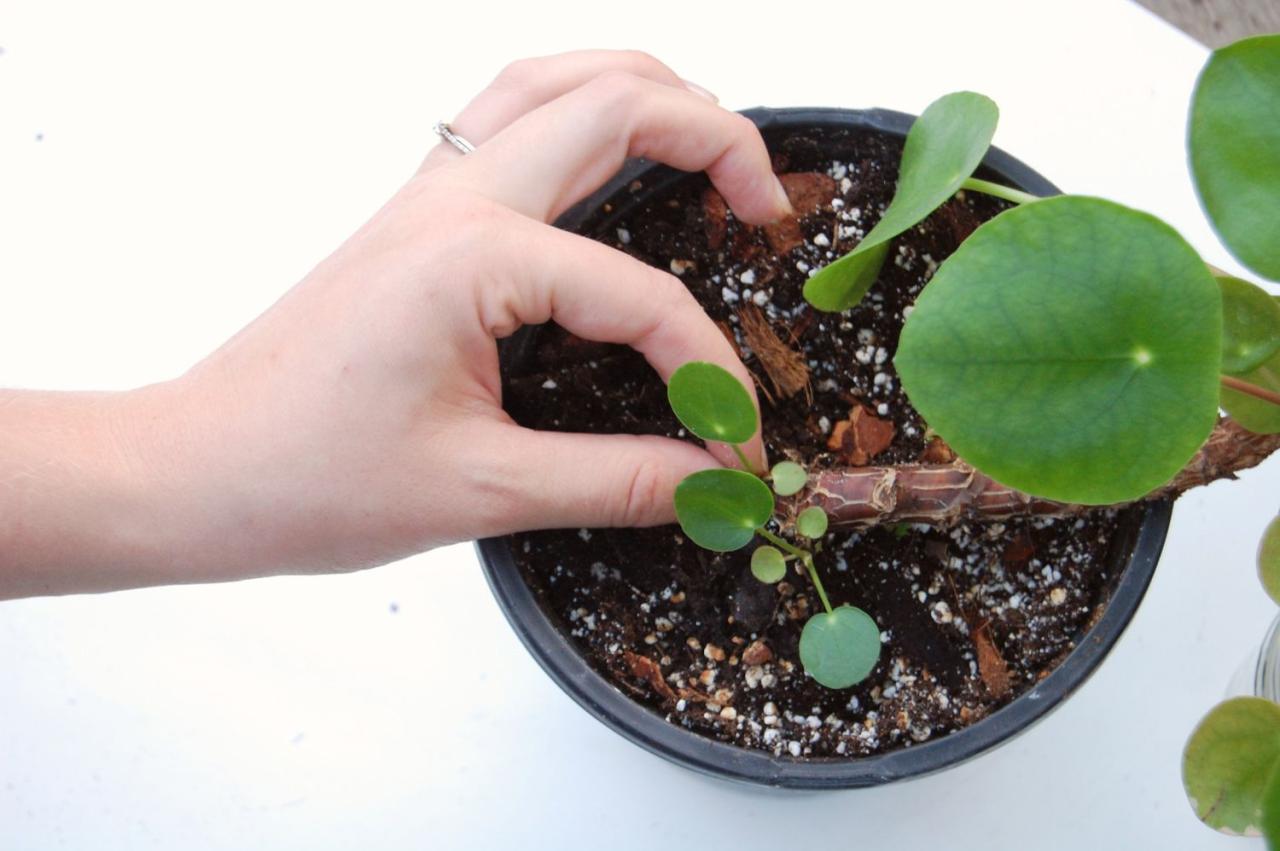
Division
Division is a method that involves separating a mature Pilea plant into multiple smaller plants. This method is best suited for larger Pilea plants that have multiple stems and roots.
- Choose a healthy plant:Select a mature Pilea plant that has multiple stems and roots.
- Gently remove the plant from its pot:Carefully loosen the soil around the plant and gently remove it from its pot.
- Separate the plant:Use your fingers or a sharp knife to gently separate the plant into multiple sections. Each section should have its own set of stems and roots.
- Plant the divisions:Plant each division in a separate pot filled with a well-draining potting mix. Water the soil thoroughly.
- Provide warmth and humidity:Place the pots in a warm, humid location. You can cover the pots with plastic domes or bags to increase humidity.
Nurturing Your Pilea Paradise
Once you have successfully propagated your Pilea plants, providing them with the right growing conditions is crucial for their continued health and flourishing. Pilea plants thrive in specific environments, and understanding their needs will ensure their vibrant growth and the creation of your Pilea paradise.
Ideal Growing Conditions for Pilea Plants, Create a Pilea Paradise: How To Propagate for Maximum Impact
Creating an optimal environment for your Pilea plants involves understanding their light, temperature, humidity, and soil preferences. Pilea plants are relatively low-maintenance, but providing them with these essential elements will maximize their growth and beauty.
- Light:Pilea plants prefer bright, indirect light. They can tolerate some direct sunlight, but it’s best to avoid exposing them to harsh midday sun, which can scorch their leaves. Ideally, place them near a window that receives filtered sunlight or in a location with bright, indirect light throughout the day.
Creating a Pilea paradise is a breeze with propagation, and you can learn similar techniques to grow your own lush Syngonium collection. Discover how to easily multiply your Syngonium plants with our guide on Transform Your Gardening Skills: How To Propagate Syngonium Easily , and then apply those principles to your Pilea propagation journey for a truly vibrant indoor jungle.
- Temperature:Pilea plants prefer warm temperatures, ideally between 65°F and 75°F (18°C and 24°C). They are sensitive to cold drafts and temperatures below 50°F (10°C) can harm their growth. Avoid placing them near cold windows or drafty areas.
- Humidity:Pilea plants thrive in humid environments. If your home is dry, you can increase humidity by placing a humidifier near your plants or by grouping them together. You can also create a humidity tray by placing a tray filled with pebbles and water beneath the pot.
The water will evaporate, increasing humidity around the plants.
- Soil:Pilea plants prefer well-draining soil that is slightly acidic. A good potting mix for Pilea plants consists of a blend of peat moss, perlite, and vermiculite. This mixture provides good drainage while retaining moisture, which is essential for healthy root development.
Creating a Thriving Environment
Once you have chosen the right pot and soil for your Pilea plants, you can create a thriving environment by mimicking their natural habitat.
- Light:Rotate your Pilea plants regularly to ensure all sides receive adequate light. This will help them grow evenly and prevent them from becoming leggy.
- Temperature:Keep your Pilea plants away from drafts and cold windows. During the winter months, you may need to provide additional warmth, especially if your home is not well-heated.
- Humidity:Use a humidifier or create a humidity tray to increase humidity around your plants. You can also mist your plants with water, especially during the dry winter months.
- Soil:Repot your Pilea plants every year or two, using fresh potting mix. This will help ensure they have adequate drainage and nutrients for continued growth.
Watering and Fertilizing Your Pilea Paradise
Proper watering and fertilizing are essential for healthy Pilea growth. Overwatering can lead to root rot, while underwatering can cause the leaves to wilt.
- Watering:Water your Pilea plants when the top inch of soil feels dry to the touch. Allow the excess water to drain from the pot. Avoid letting the soil become completely dry, as this can stress the plants.
- Fertilizing:Fertilize your Pilea plants every two to four weeks during the growing season (spring and summer) with a balanced liquid fertilizer diluted to half strength. During the winter months, reduce fertilization to once a month or stop altogether.
Pilea Propagation Troubleshooting: Create A Pilea Paradise: How To Propagate For Maximum Impact
Pilea propagation, while generally straightforward, can encounter certain challenges. Understanding common issues and implementing preventive measures can significantly increase your success rate. Here, we delve into some of the most frequent problems and provide practical solutions to overcome them.
Root Rot
Root rot, a common issue in propagation, occurs when excess moisture creates an environment conducive to fungal growth. This fungal activity can damage and eventually kill the roots, hindering the plant’s ability to absorb water and nutrients.
- Signs of Root Rot:The most noticeable sign of root rot is wilting, even when the soil is moist. The leaves may also turn yellow or brown, and the stem might become soft or mushy.
- Prevention:The best way to prevent root rot is to use well-draining potting mix and ensure proper drainage. Avoid overwatering and allow the soil to dry slightly between waterings.
- Treatment:If you suspect root rot, remove the cutting from the water or soil and inspect the roots. Trim away any damaged or rotted roots with a sharp, sterile tool. Repot the cutting in fresh, well-draining potting mix and ensure proper drainage.
Showcasing Your Pilea Paradise
Now that you’ve successfully propagated your Pilea plants, it’s time to showcase your green thumb and create a captivating display. The possibilities are endless, from cascading foliage to vibrant miniature forests, your Pilea paradise can be a reflection of your personal style and creativity.
Container Options for Your Pilea Paradise
Choosing the right container can significantly enhance the aesthetic appeal of your Pilea plants. Here are some popular options:
- Hanging Baskets:These are ideal for showcasing the cascading nature of Pilea varieties like the Pilea peperomioides. The trailing stems create a lush and dramatic effect, adding a touch of greenery to any space.
- Terrariums:Terrariums offer a unique and enclosed environment for Pilea plants, allowing you to create miniature ecosystems. These glass containers provide a sense of depth and intrigue, highlighting the delicate beauty of the foliage.
- Decorative Pots:From sleek ceramics to rustic terracotta, there’s a wide array of decorative pots available to complement your Pilea plants. Choose pots that match your home decor or create a contrasting statement with vibrant colors and textures.
Display Ideas for a Pilea Paradise
Here are some creative and inspiring ideas for displaying your Pilea plants:
- Layered Shelves:Create a tiered display by placing your Pilea plants on different shelves, showcasing the various heights and textures of your collection. You can arrange them by color, size, or variety, creating a visually appealing and organized presentation.
- Groupings and Clusters:Combine different Pilea varieties in groups or clusters to create a lush and vibrant display. This approach creates a sense of unity and showcases the diverse textures and colors of your collection.
- Mixed Plant Arrangements:Incorporate other plants alongside your Pilea plants to create a diverse and interesting display. Consider combining Pilea with ferns, succulents, or other low-maintenance houseplants to create a harmonious and visually appealing arrangement.
Pilea Paradise: A Visual Representation
| Pilea Variety | Display Arrangement | Container ||—|—|—|| Pilea peperomioides (Chinese Money Plant) | Hanging basket | Terracotta pot || Pilea cadierei (Aluminum Plant) | Layered shelves | Ceramic pot || Pilea involucrata (Moon Valley) | Groupings and clusters | Glass terrarium || Pilea spruceana (Friendship Plant) | Mixed plant arrangement | Decorative pot || Pilea glauca (Silver Tree) | Hanging basket | Macrame hanger |
Ultimate Conclusion
With a little knowledge and a touch of green thumb magic, you can transform your home into a vibrant Pilea paradise. Whether you’re a seasoned plant parent or a curious beginner, this guide provides the essential tools and insights to unlock the secrets of successful Pilea propagation.
So, gather your cuttings, prepare your potting mix, and embark on a journey of creating a Pilea paradise that will bring beauty and joy to your life for years to come.
Commonly Asked Questions
What is the best time of year to propagate Pilea?
Spring and summer are generally considered the best times to propagate Pilea, as the plants are actively growing and have more energy for root development.
How often should I water my Pilea cuttings?
Keep the soil consistently moist but not soggy. Water when the top inch of soil feels dry to the touch.
Can I propagate Pilea in water?
Yes, you can propagate Pilea in water. Simply place the cutting in a glass of water and change the water every few days.
What are some signs that my Pilea cuttings are rooting?
You’ll notice new growth emerging from the cutting, and the roots may be visible at the base of the cutting.
