Discover How to Achieve a Thriving Clematis Collection: A world of vibrant blooms awaits those who embrace the captivating Clematis vine. From selecting the right varieties for your garden to mastering the art of care and propagation, this comprehensive guide provides all the knowledge you need to cultivate a thriving Clematis collection.
Prepare to be enchanted by the diverse shapes, colors, and bloom times of these elegant climbers, as we delve into the secrets of their success.
Clematis, with its mesmerizing flowers and graceful vines, can transform any garden into a breathtaking oasis. This guide will take you on a journey through the fascinating world of Clematis, covering everything from selecting the perfect varieties to providing expert care for a thriving collection.
Whether you’re a seasoned gardener or just starting out, this guide will empower you to create a stunning display of Clematis that will enchant you for years to come.
Introduction to Clematis
Clematis, a genus of flowering vines, belongs to the buttercup family, Ranunculaceae. These captivating plants are known for their vibrant, showy flowers and their ability to climb and adorn structures with their graceful foliage. Clematis species and cultivars exhibit a wide range of growth habits, flower shapes, and colors, making them versatile additions to any garden.
Diversity of Clematis Species and Cultivars
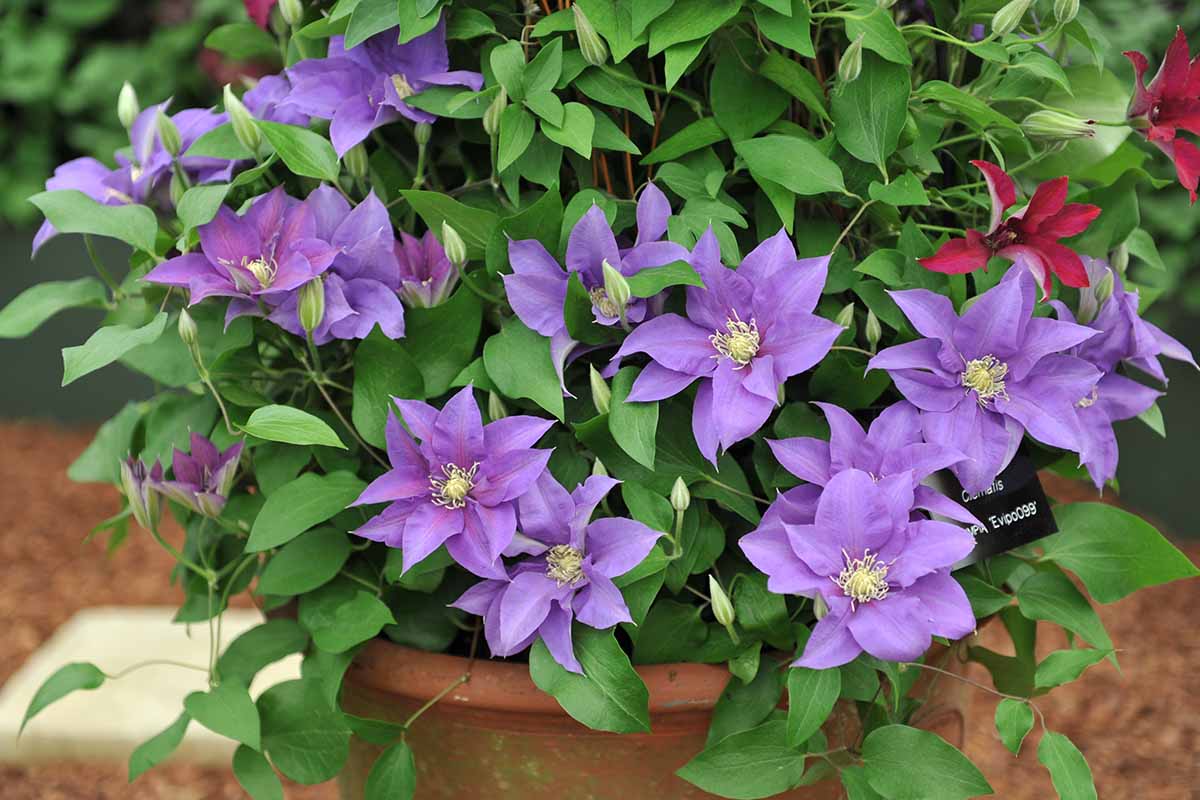
Clematis species and cultivars display remarkable diversity in their characteristics, offering a wide array of choices for gardeners. This diversity encompasses aspects such as bloom times, flower shapes, and colors.
- Bloom Times: Clematis species and cultivars bloom throughout the growing season, with some varieties offering multiple flushes of flowers. Early-blooming varieties, such as Clematis alpinaand Clematis montana, typically flower in late spring. Mid-season bloomers, such as Clematis jackmaniiand Clematis viticella, adorn gardens with their flowers in summer.
Late-blooming varieties, such as Clematis tanguticaand Clematis texensis, grace the garden with their flowers in late summer and early autumn.
- Flower Shapes: Clematis flowers exhibit a variety of shapes, from simple, star-shaped blooms to elaborate, double-flowered varieties. The shape of the flower can significantly influence the overall aesthetic appeal of the plant. For example, Clematis montanaproduces clusters of small, star-shaped flowers, while Clematis jackmaniifeatures large, bell-shaped flowers.
- Colors: Clematis flowers come in a dazzling array of colors, ranging from pure white and soft pastels to vibrant reds, blues, and purples. The color of the flowers can significantly impact the overall color scheme of the garden. For instance, Clematis viticellais known for its purple flowers, while Clematis ‘Nelly Moser’produces delicate pink flowers.
Selecting the Right Clematis for Your Garden

Choosing the perfect Clematis for your garden involves considering several factors to ensure a thriving collection. The key is to select varieties that align with your climate, soil conditions, desired bloom time, and preferred growth habit.
Understanding Clematis Pruning Groups
Knowing the different pruning groups is crucial for proper care and maximizing Clematis blooms. Each group has specific pruning requirements that influence the plant’s growth and flowering patterns.
Pruning groups categorize Clematis based on their flowering habits and when they produce their new growth.
Pruning Group |
Description |
Pruning Requirements |
|---|---|---|
Group 1 |
Flower on old wood (last year’s growth) |
Prune lightly after flowering, removing only dead or damaged stems. |
Group 2 |
Flower on both old and new wood |
Prune lightly after flowering, removing only dead or damaged stems. Prune back new growth in late winter or early spring. |
Group 3 |
Flower on new wood (current year’s growth) |
Prune back hard in late winter or early spring, removing all stems to just above a pair of buds. |
Categorizing Clematis by Bloom Time
Clematis varieties offer a wide range of bloom times, allowing you to enjoy flowers throughout the growing season.
Bloom Time |
Popular Varieties |
|---|---|
Early (Spring) |
|
Mid (Summer) |
|
Late (Autumn) |
|
Planting and Establishing Clematis
Planting Clematis correctly is crucial for their successful establishment and growth. The right conditions, proper planting technique, and ongoing care will ensure your Clematis thrive and reward you with abundant blooms.
Ideal Planting Conditions
Clematis thrive in well-drained soil that is slightly acidic to neutral (pH 6.0-7.0). They prefer a location with at least 6 hours of sunlight per day, especially in the morning, and some afternoon shade, especially in hot climates. Clematis are also known to tolerate partial shade, but flowering may be reduced.
- Soil:Amend heavy clay soil with compost or peat moss to improve drainage. Sandy soil may benefit from adding organic matter to retain moisture. Avoid planting Clematis in areas with poor drainage, as this can lead to root rot.
- Sunlight:While Clematis enjoy sunlight, it’s important to provide some shade during the hottest part of the day, especially in warmer climates. This helps prevent the soil from drying out too quickly and reduces stress on the plant.
- Planting Time:The best time to plant Clematis is in the spring or fall. In spring, plant after the last frost has passed. In fall, plant several weeks before the first frost.
Planting Clematis, Discover How to Achieve a Thriving Clematis Collection
Planting Clematis is a straightforward process, but a few key steps are essential for success.
- Prepare the Planting Hole:Dig a hole twice as wide and as deep as the root ball.
- Amend the Soil:Mix in compost or other organic matter to improve drainage and fertility.
- Position the Clematis:Place the Clematis in the hole so the top of the root ball is level with the ground. Ensure the crown of the plant (the point where the roots meet the stem) is not buried.
- Backfill the Hole:Gently fill the hole with soil, ensuring the roots are well-covered. Firm the soil around the plant to ensure good contact.
- Water Thoroughly:Water the Clematis deeply after planting to settle the soil and help the roots establish.
- Provide Support:Clematis need a sturdy support structure to climb. Install a trellis, fence, or other support system near the plant, allowing the vines to grow upwards.
- Spacing:Space Clematis according to their mature size. Most varieties need 2-3 feet of space between plants.
Watering and Fertilizing
During the establishment phase, consistent watering is crucial. Water deeply and regularly, especially during dry periods. Ensure the soil is consistently moist but not soggy.
- Watering:Water deeply once or twice a week, allowing the soil to dry out slightly between waterings. During hot weather, you may need to water more frequently.
- Fertilizing:Use a balanced fertilizer, such as a 10-10-10 formula, every few weeks during the growing season. Avoid over-fertilizing, as this can lead to excessive foliage growth at the expense of flowering.
Clematis Care and Maintenance
Providing the right care for your Clematis collection is essential for ensuring their health and longevity. From proper watering and fertilizing to timely pruning and effective pest and disease control, a few key practices can significantly enhance your Clematis’s growth and flowering potential.
Watering Clematis
Adequate watering is crucial for the healthy growth of Clematis. Clematis prefer consistently moist soil, especially during the active growing season. Water deeply and thoroughly, allowing the water to penetrate the root zone. However, avoid overwatering, as this can lead to root rot.
- Water deeply and thoroughly, ensuring the water reaches the root zone.
- Water more frequently during dry periods or when the soil feels dry to the touch.
- Avoid overwatering, as this can lead to root rot.
- Mulch around the base of the plant to help retain moisture.
Fertilizing Clematis
Clematis benefit from regular fertilization, especially during the active growing season. Use a balanced fertilizer specifically designed for flowering plants. Apply the fertilizer according to the manufacturer’s instructions.
- Apply a balanced fertilizer specifically designed for flowering plants.
- Fertilize Clematis in early spring, before new growth emerges.
- Repeat fertilization every 4-6 weeks during the active growing season.
- Avoid over-fertilizing, as this can lead to excessive foliage growth at the expense of flowering.
Pruning Clematis
Pruning is an essential aspect of Clematis care, promoting healthy growth and abundant flowering. Clematis are categorized into three pruning groups, each requiring a different approach to pruning.
Clematis Pruning Groups
Pruning Group |
Pruning Time |
Pruning Technique |
|---|---|---|
Group 1 (Early-flowering) |
Immediately after flowering |
Lightly prune to remove any dead or damaged stems and to shape the plant. |
Group 2 (Mid-season flowering) |
Late winter or early spring |
Prune back to a pair of strong buds, removing any weak or damaged stems. |
Group 3 (Late-flowering) |
Late winter or early spring |
Prune back hard to just above a pair of strong buds. |
Identifying and Addressing Common Clematis Problems
Understanding common Clematis problems and how to address them is crucial for maintaining a healthy collection.
- Wilting:Wilting can be caused by several factors, including inadequate watering, root rot, or pests. Check the soil moisture levels and address any underlying issues.
- Yellowing Leaves:Yellowing leaves can indicate nutrient deficiencies, overwatering, or pests. Monitor the plant’s growth and address the specific cause.
- Fungal Diseases:Clematis are susceptible to fungal diseases, such as powdery mildew and leaf spot. Provide good air circulation, avoid overhead watering, and treat affected plants with a fungicide.
Propagating Clematis: Discover How To Achieve A Thriving Clematis Collection
Propagating Clematis allows you to expand your collection, share your passion with others, or simply create more of your favorite varieties. You can propagate Clematis using various methods, each with its own advantages and disadvantages. The success of any propagation method depends on selecting healthy and vigorous Clematis plants.
Cuttings
Taking cuttings is a popular method for propagating Clematis. It involves taking a section of a stem and encouraging it to root.
- Softwood Cuttings:Softwood cuttings are taken from new growth that is still pliable. These cuttings are typically taken in the spring or early summer when the plant is actively growing. They root more quickly than hardwood cuttings.
- Semi-hardwood Cuttings:Semi-hardwood cuttings are taken from slightly older growth that has begun to harden. They are usually taken in late summer or early fall. Semi-hardwood cuttings are more likely to root than hardwood cuttings.
- Hardwood Cuttings:Hardwood cuttings are taken from mature, dormant wood in the winter. They are more challenging to root than softwood or semi-hardwood cuttings but are more likely to survive.
To take cuttings, use a sharp knife or pruning shears to cut a section of stem that is 4-6 inches long. Remove the leaves from the bottom 2 inches of the stem and make a diagonal cut at the base.
Dip the cut end of the stem in rooting hormone and insert it into a pot filled with a rooting medium such as vermiculite or perlite. Keep the rooting medium moist and place the pot in a warm, bright location out of direct sunlight.
Once the cuttings have rooted, they can be transplanted into individual pots.
Layering
Layering is another effective method for propagating Clematis. It involves bending a stem to the ground and burying a portion of it in the soil. The buried portion of the stem will eventually root and form a new plant.
- Simple Layering:This method involves bending a stem to the ground and burying a section of it in the soil. The buried portion of the stem will eventually root and form a new plant. The stem should be pinned to the ground with a wire or rock to keep it in place.
- Tip Layering:Tip layering involves bending the tip of a stem to the ground and burying it in the soil. The buried portion of the stem will eventually root and form a new plant. This method is suitable for plants with long, flexible stems.
- Mound Layering:Mound layering involves piling soil around a stem to encourage rooting. This method is suitable for plants with multiple stems. This method is best done in the spring before new growth emerges.
Once the stem has rooted, it can be cut from the parent plant and transplanted into a separate pot or location in the garden.
Seed Propagation
Seed propagation is the least common method for propagating Clematis. Clematis seeds can be sown directly in the garden or in a seed tray.
Just as nurturing a thriving clematis collection requires understanding their specific needs, so too does multiplying your indoor plants. If you’re looking to expand your green space, you might be interested in learning how to easily propagate Schefflera plants, which are known for their air-purifying qualities.
Discover How to Multiply Your Schefflera Plants with These Easy Methods and you’ll be well on your way to enjoying the beauty of these versatile plants. Once you’ve mastered the art of propagating Schefflera, you’ll be ready to tackle the exciting challenge of building a truly spectacular clematis collection.
- Direct Sowing:Direct sowing involves planting the seeds directly in the garden bed. The seeds should be sown in the spring or fall. This method is suitable for Clematis species that are native to your region.
- Seed Tray:Seed trays are used to germinate Clematis seeds indoors. The seeds should be sown in a seed tray filled with a seed starting mix. Keep the seed tray moist and in a warm, bright location out of direct sunlight. Once the seedlings have a few sets of true leaves, they can be transplanted into individual pots.
Clematis seeds can take a long time to germinate, sometimes up to a year or more. Seed propagation is not always reliable and can be a slow process.
Cultivating a thriving clematis collection is all about understanding their needs for sun, soil, and support. Just like clematis, Mother of Thousands plants also thrive with the right care and attention. To learn how to create a vibrant collection of these fascinating succulents, check out this helpful guide: How to Create a Vibrant Collection of Mother of Thousands Plants.
Once you’ve mastered the art of growing these unique plants, you’ll be well on your way to achieving a flourishing clematis collection.
Designing with Clematis

Clematis, with their vibrant blooms and adaptable nature, are a gardener’s dream for adding vertical interest and color to any landscape. Their climbing habit makes them ideal for creating stunning displays on trellises, arbors, fences, and walls, transforming ordinary spaces into breathtaking oases.
This section will explore creative ways to incorporate clematis into your garden design, highlighting their versatility and enhancing the overall aesthetic appeal.
Utilizing Clematis for Vertical Gardens
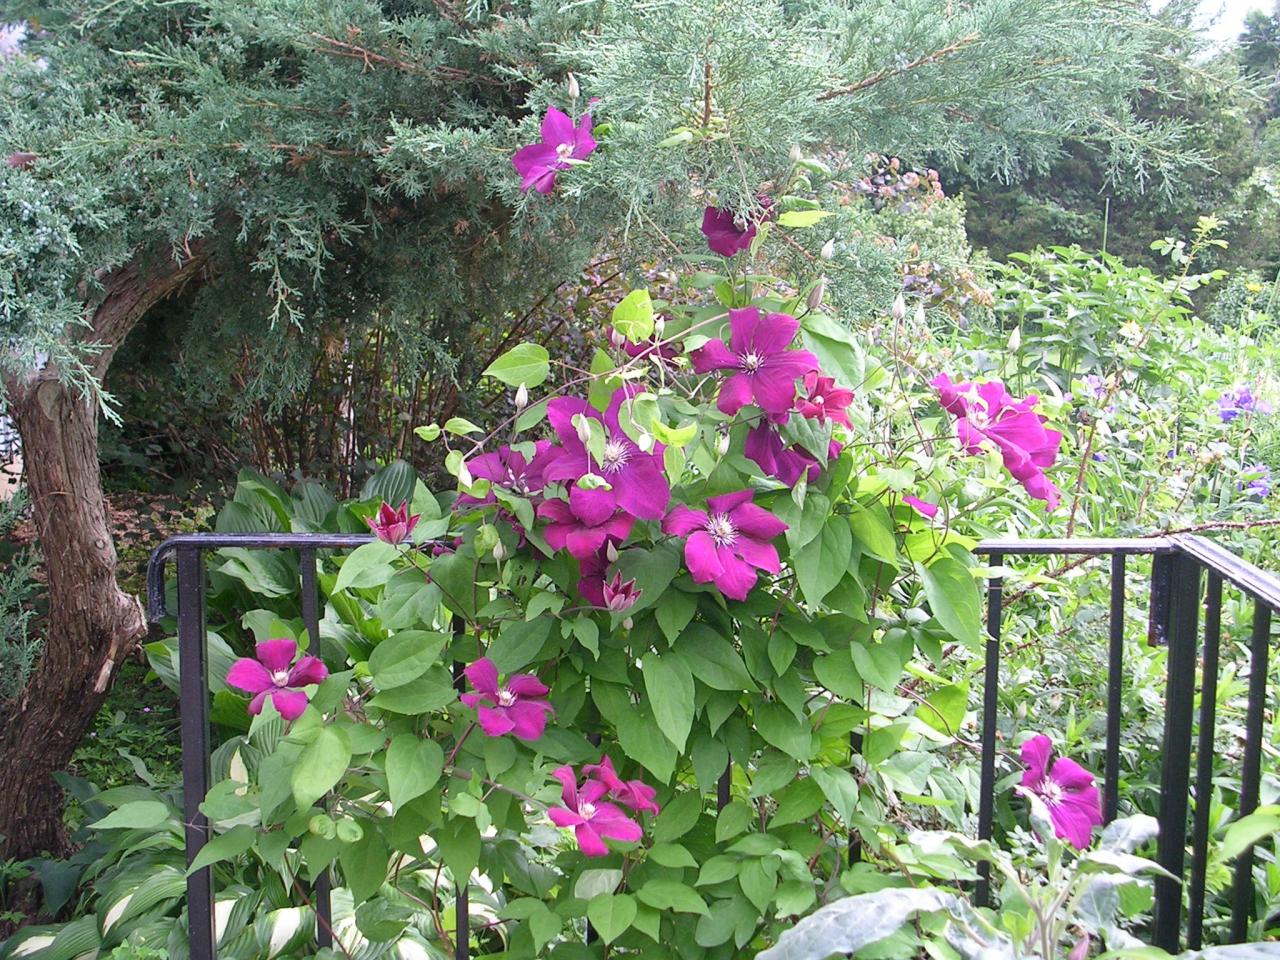
Clematis are excellent choices for vertical gardening, adding a touch of elegance and vibrancy to any structure. Their climbing tendrils, which are sensitive to touch, readily attach themselves to various surfaces, requiring minimal support.
- Trellises:Clematis are a classic choice for trellises, creating a cascading waterfall of blooms. Choose trellises in various shapes and sizes to complement the clematis variety and the overall garden design.
- Arbors:Arbors adorned with clematis create romantic and inviting gateways, leading to hidden garden corners or walkways.
- Fences:Clematis can effectively conceal unsightly fences and create a privacy screen, transforming a bland barrier into a beautiful focal point.
- Walls:Clematis can climb walls, adding color and texture, particularly in areas where space is limited.
Final Conclusion
Cultivating a thriving Clematis collection is a rewarding journey that combines horticultural knowledge with artistic flair. By understanding their needs, embracing proper care techniques, and applying creative design principles, you can create a garden that is both visually stunning and teeming with life.
As you witness your Clematis collection flourish, you’ll be inspired by the beauty and resilience of these remarkable plants, transforming your outdoor space into a true sanctuary of nature’s artistry.
Expert Answers
What are the best Clematis varieties for beginners?
Clematis varieties like ‘Jackmanii’ and ‘Nelly Moser’ are known for their hardiness and ease of care, making them excellent choices for beginners.
How often should I fertilize my Clematis?
Fertilize Clematis every 4-6 weeks during the growing season with a balanced fertilizer.
What are some common Clematis pests and diseases?
Clematis are susceptible to pests like aphids and spider mites, and diseases like powdery mildew and wilt. Regular inspection and appropriate treatment can help prevent these issues.
